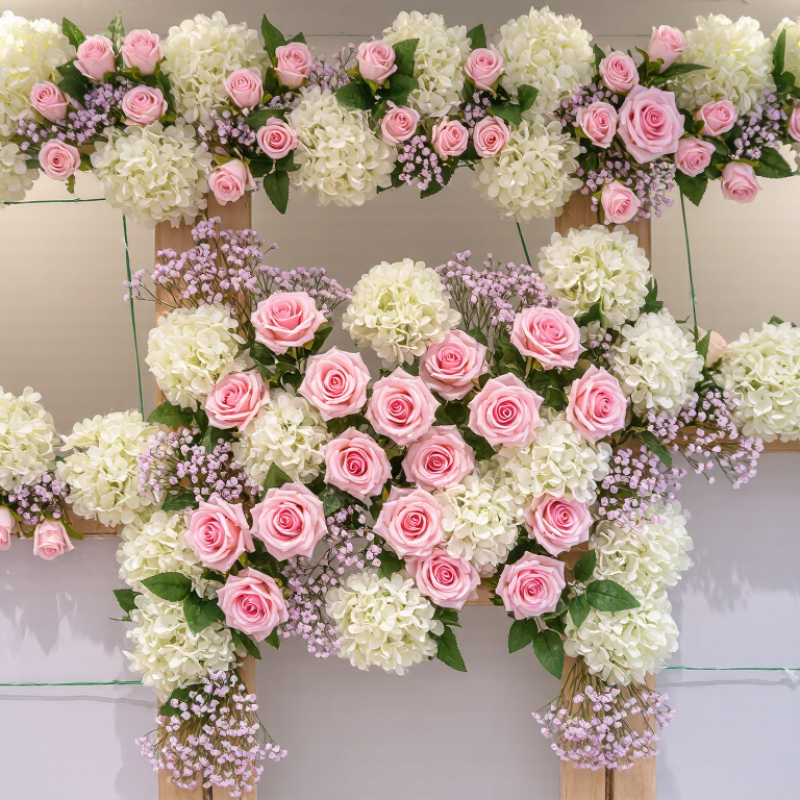
How to create a DIY silk flower wall backdrop is easier when you begin with a clear visual plan. I have found that successful backdrops depend on three details: sturdy support, realistic flowers, and balanced color placement. Silk flowers work well because they remain fresh-looking throughout weddings, photo sessions, birthdays, and home celebrations. However, not every artificial bloom looks convincing. Choose petals with varied textures, flexible stems, and natural color transitions. A few imperfect leaves can make the arrangement feel more authentic.
Measure the wall before buying materials. A simple frame made from lightweight boards, PVC pipe, or a stable grid can prevent sagging. Secure each flower with floral wire, strong ties, or suitable adhesive, depending on the surface. Keep heavier clusters near supported areas, especially when the backdrop will be moved. This matters.
The design should guide the eye without covering every inch of the wall. Combine larger roses, smaller filler flowers, and greenery to create depth. Leave small spaces between clusters so the background does not appear crowded. Soft lighting can highlight the silk petals, while warm tones create a welcoming atmosphere for photographs. Test the arrangement from several angles before final attachment. It may look balanced from the front but uneven in pictures. That happened to me.
This guide will explain practical materials, flower selection, assembly methods, placement techniques, and styling adjustments. It also considers reusable construction, reliable fastening, and careful preparation for safer indoor displays. Expect a polished result, but allow room for personal judgment. Handmade decor rarely looks perfect, and that is part of its charm.
Materials and Tools for a DIY Silk Flower Wall Backdrop
A DIY silk flower wall backdrop needs a stable frame, realistic flowers, and tools that prevent messy repairs. Grand View Research valued the global artificial flowers market at about USD 1.8 billion in 2023, showing continued demand for reusable decorative materials. Silk flowers can support that trend because they resist wilting and store easily.
Prepare a lightweight mesh panel, silk flowers, floral wire, green floral tape, zip ties, and a fabric backing. Use wire cutters, sharp scissors, pliers, a measuring tape, and a low-temperature glue gun. Choose flowers with flexible stems and varied sizes. Large blooms create focal points, while smaller leaves hide gaps. A 1.2-meter panel usually needs more flowers than expected.
Plan the layout on the floor before attaching anything. Secure heavy stems with wire, not glue alone. Add two or three attachment points per large bloom. In my first attempt, the lower corner sagged because I trusted thin zip ties. That was avoidable. Use a stronger support rod along the top edge. The Event Industry Council reports that event waste remains a major sustainability concern, so reusable panels and removable fasteners make practical sense. Test the backdrop under its real lighting. Some silk petals looked flat indoors. A soft side light helped, though the arrangement still felt slightly crowded.
How to Make a DIY Silk Flower Wall Backdrop: Materials and Tools
Typical quantities for an 8 ft × 8 ft silk flower wall backdrop. The chart provides a practical planning reference for a medium-density design.
Prepare the backdrop frame or grid panels first, then attach greenery and silk flowers with floral wire or zip ties. Scissors, wire cutters, a measuring tape, and a step ladder are the primary tools needed for assembly.
Planning the Backdrop Design, Size, and Flower Arrangement
How to Make a DIY Silk Flower Wall Backdrop
Planning the Backdrop Design, Size, and Flower Arrangement
Start by measuring the wall, floor space, and camera area. A 6-by-8-foot backdrop works well for portraits and small celebrations. Leave extra width for people who move. I once made mine too narrow. Guests stood outside the floral frame.
Choose one visual direction before buying flowers. A full floral wall feels lush, while a corner arrangement leaves useful open space. Sketch the design on paper. Mark the largest blooms, medium flowers, and greenery with simple circles. This prevents random clustering and reduces wasted materials.
Place the heaviest flowers near the support structure. Use lightweight stems around the outer edges. Group flowers in uneven clusters, such as three large blooms beside two smaller ones. Repeated spacing can look stiff. Vary the heights and allow a few leaves to extend beyond the main shape.
For a balanced arrangement, repeat each main color at least three times. Keep bright flowers near eye level for photographs. Test the backdrop under the actual lighting. Silk petals can look flat in strong, direct light. Softer side lighting usually reveals their texture better.
Secure every stem firmly, especially above head height. I prefer checking the wall after one hour. Some arrangements sag once the materials settle. My early design needed more greenery, but adding too much later made the frame feel crowded. Step back often and edit without fear.
How to Make a DIY Silk Flower Wall Backdrop - Planning the Backdrop Design, Size, and Flower Arrangement
| Design Plan |
Recommended Backdrop Size |
Flower Coverage |
Main Flowers |
Filler Flowers |
Greenery |
Arrangement Pattern |
Estimated Setup Time |
| Small dessert table |
6 ft W × 7 ft H
(1.8 m × 2.1 m) |
30–40% floral coverage |
25–35 large blooms |
35–50 small blooms |
20–30 foliage stems |
One concentrated corner cluster with a light diagonal extension |
2–3 hours |
| Portrait photo area |
8 ft W × 8 ft H
(2.4 m × 2.4 m) |
45–55% floral coverage |
45–60 large blooms |
60–80 small blooms |
30–45 foliage stems |
Asymmetrical crescent shape framing one side of the subject |
3–4 hours |
| Full wall statement backdrop |
10 ft W × 8 ft H
(3.0 m × 2.4 m) |
60–75% floral coverage |
75–100 large blooms |
100–140 small blooms |
50–70 foliage stems |
Three connected clusters with varied heights and open spaces |
5–7 hours |
| Wedding ceremony focal wall |
12 ft W × 8 ft H
(3.7 m × 2.4 m) |
50–65% floral coverage |
90–120 large blooms |
130–170 small blooms |
65–90 foliage stems |
Balanced side clusters, leaving the center open for photographs |
6–8 hours |
| Compact apartment backdrop |
5 ft W × 6 ft H
(1.5 m × 1.8 m) |
25–35% floral coverage |
18–25 large blooms |
25–35 small blooms |
15–25 foliage stems |
Low horizontal arrangement across the bottom third |
1.5–2.5 hours |
| Dessert or gift table |
8 ft W × 7 ft H
(2.4 m × 2.1 m) |
35–45% floral coverage |
40–55 large blooms |
50–75 small blooms |
25–40 foliage stems |
L-shaped cluster around the upper corner and table edge |
3–4 hours |
| Minimal modern design |
8 ft W × 8 ft H
(2.4 m × 2.4 m) |
20–30% floral coverage |
30–45 large blooms |
20–35 small blooms |
20–30 foliage stems |
Single vertical column with deliberate negative space |
2.5–3.5 hours |
Quantities are practical planning estimates for standard silk flower heads measuring approximately 2–5 inches (5–13 cm) across. Add 10–15% extra stems to allow for trimming, spacing adjustments, and replacements.
Attaching Silk Flowers and Creating a Balanced Display
A silk flower wall looks convincing when attachment feels secure and the spacing feels natural. I begin with a lightweight mesh panel or foam backing, then mark a loose grid with removable tape. This prevents heavy clusters from pulling the surface forward. I attach stems with floral wire, cable ties, or low-temperature adhesive, depending on the backing. Each connection should hold firmly without crushing petals. Grand View Research estimated the global artificial flowers market at about USD 1.77 billion in 2023, with continued growth expected through 2030. That demand reflects a practical benefit: reusable faux flowers can create consistent displays for repeated events.
Balance matters more than filling every gap. I place the largest blooms near the visual center, then reduce flower size toward the edges. Odd-numbered clusters usually appear less rigid. Leave small areas of backing visible. A completely packed wall can look heavy and artificial. The Event Industry Council recommends considering sightlines, guest movement, and photo positions when planning event décor. I test the backdrop from several angles, including the camera distance. One arrangement looked balanced in person but became top-heavy in photographs. I moved two large flowers lower. That small correction helped.
Tips: Use three flower sizes and repeat each color across the panel. Check the wall’s weight limit before hanging it. Keep spare stems nearby. Some petals may crease during installation, so gently reshape them with clean hands and mild warmth. I still prefer a slightly imperfect cluster; perfect symmetry often feels less believable.
Mounting, Maintaining, and Reusing the Finished Backdrop
How to Make a DIY Silk Flower Wall Backdrop
Mounting, Maintaining, and Reusing the Finished Backdrop
A sturdy mounting plan keeps a silk flower wall attractive and safer to handle. I usually attach flowers to lightweight mesh panels rather than directly to a wall. This method spreads the weight and simplifies removal. My first panel sagged because I underestimated the backing material. That mistake taught me to test one finished section before building the entire backdrop.
Choose fasteners that match the wall surface and panel weight. Use suitable anchors for plaster, drywall, brick, or wood. Never rely on tape alone for a heavy arrangement. Place attachment points near the panel corners and center. Check every connection by gently pulling the panel before decorating the area. Leave a small gap between the flowers and wall when ventilation matters. It also makes removal easier.
Dust silk flowers with a soft brush or cool air from a distance. Avoid soaking them, since moisture may loosen glue and stain fabric. Keep the backdrop away from strong sunlight, heaters, and damp storage areas. After each event, photograph the arrangement and label each panel. That small step saves time later. Remove damaged stems carefully, but do not repair everything immediately. I once reused a weakly glued flower, and it fell during setup. Now I inspect every attachment under bright light. Store panels flat when possible, with clean tissue between layers. If space is limited, keep them upright without crushing the petals.
Conclusion
How to create a DIY silk flower wall backdrop begins with gathering silk flowers, greenery, floral wire, adhesive, scissors, measuring tools, and a suitable support structure. First, determine the backdrop’s purpose, location, and desired dimensions. Sketch a simple layout, choose a color palette, and plan the flower arrangement so larger blooms, smaller flowers, and greenery create a balanced and attractive design. Preparing the materials in advance will make the assembly process smoother and more organized.
Next, build a stable frame or backing that can safely support the decorations and stand securely in its intended location. Attach the flowers in sections, working from the main focal points outward while filling empty spaces with greenery and smaller details. Check the design from different angles and adjust the spacing as needed. Once complete, mount the backdrop carefully, protect it from moisture and excessive sunlight, and gently dust it during storage. With proper care, the finished flower wall can be refreshed, transported, and reused for future celebrations or decorative settings.

 Maison Flower